I recently purchased a ZoomFloppy board, which allows old Commodore IEC serial devices – most importantly, floppy drives – to be connected to a USB port on a modern computer. It’s a great little device, but the instructions aren’t up to scratch: binary software is provided for Windows, manual installation instructions for OS X, but Linux users are left to their own devices.

Here, if for no other reason than I’ll need these if I have to reinstall it, is how I got the ZoomFloppy working on Ubuntu 14.04. You’ll need an up-to-date compilation environment installed, so start by making sure you’ve got the basics:

sudo apt-get install libusb-dev build-essential linux-headers-generic git

Next, you’ll want to download, compile and install the CC65 compiler. No, you really will. Trust me on this one.

cd ~
git clone https://github.com/cc65/cc65.git
cd cc65
make
sudo prefix=/usr make install
Assuming all went well, download, compile and install OpenCBM:
cd ~
git clone  git://git.code.sf.net/p/opencbm/code opencbm
cd opencbm/opencbm
make -f LINUX/Makefile
sudo make -f LINUX/Makefile install install-all install-plugin-xum1541
sudo ln -s /usr/local/lib/libopencbm.so.0 /usr/lib/libopencbm.so.0
That last line fixes a problem where OpenCBM ends up looking in the wrong place for its library.  Finally, you’ll need to add udev rules for the ZoomFloppy hardware itself:
sudo vim /etc/udev/rules.d/45-opencbm-parallel.rules
Add the following lines to the bottom of the file, then save and quit:
SUBSYSTEM!="usb_device", ACTION!="add", MODE="0666", GOTO="opencbm_rules_end"
# zoom floppy
ATTRS{idVendor}=="16d0", ATTRS{idProduct}=="0504", GROUP="users", MODE="0666"
LABEL="opencbm_rules_end"
Restart udev:
sudo service udev restart
Connect your ZoomFloppy and IEC device and check all is well:
cbmctrl detect
That’s it. Enjoy!
UPDATE:
I’ll probably need to refer to these instructions for enabling the VICE C64/128 emulator to talk to a physical drive via the ZoomFloppy at some point, too. You need to check two options off. The first is Settings -> Peripheral Settings -> Device #8 -> Enable IEC Device. The second Settings -> Peripheral Settings -> Device #8 -> Device Type -> Real Device Access. With both ticked and the ZoomFloppy connected, you can talk to the physical floppy drive as though it were Device 8 (i.e. load”*”,8,1). Huzzah!

I recently became the owner of an HP ProLiant MicroServer N54L, a small box with a bunch of hard drive bays and a low-power AMD Turion dual-core processor. I’ve also been tweaking it quite heavily, resulting in a dramatic improvement in network performance and a significant drop in power draw – and this is how I did it. If you’re not running Linux, mind, everything past Step 1 is likely of no use to you.

Warning: The advice here worked for me, but some of it – in particular turning off journalling and using an aggressive spin-down profile on the drives – is hardly best-practice. It can even shorten the lifespan of certain components. Where something can have a deleterious effect, I’ll highlight it – but go into this warned that not everything I’ve done here is for everyone.

Step 1: Unlock the BIOS
The MicroServer is HP’s entry-level server, and as a result is missing several features of higher-end models – in particular hot-swap drive bays. This isn’t a physical restriction, but a fake restriction put in place by HP – and it can be removed by installing a modified BIOS. Doing so also allows all the SATA ports to run at 3Gb/s – two are limited to 1.5Gb/s by default – and fixes a flaw in the original BIOS that prevents the NIC from operating under certain operating systems.

HP has recently taken the decision to lock its BIOS updates behind a warranty wall: if you don’t have a warranty, you can’t get BIOS updates. That’s not very nice, so it’s a good job that someone has uploaded a pre-modified BIOS. The naughty person. Just download the file, write the image to a USB stick with dd (or ImageWriter if you’re on Windows) and power the server on with the stick in a port. Wait for the DOS prompt to appear and power off – you’re done.

Step 2: Network Tuning
Out of the box, I found the MicroServer’s network performance to be poor indeed under Ubuntu 13.10. Some of the blame has to go to the cheap Broadcom NIC, but I figured I could do better.

First, edit /etc/rc.local and stick the following lines into it, just above ‘exit 0’:

ethtool -G em1 rx 511
ifconfig em1 txqueuelen 1000
defaultroute=`ip route | grep "^default" | head -1`
ip route change $defaultroute initcwnd 10

This forces the NIC to use its entire ring buffer for RX packets – by default only 200 bytes of the 511 bytes available get used – and increases the transmit queue length to a figure better suited to gigabit network traffic. The default route is also tweaked.

Next, edit /etc/sysctl.conf and add the following:

fs.file-max = 100000
net.core.netdev_max_backlog = 50000
net.core.optmem_max = 40960
net.core.rmem_default = 16777216
net.core.rmem_max = 16777216
net.core.wmem_default = 16777216
net.core.wmem_max = 16777216
net.ipv4.conf.all.accept_redirects = 0
net.ipv4.conf.all.accept_source_route = 0
net.ipv4.conf.all.log_martians = 1
net.ipv4.conf.all.send_redirects = 0
net.ipv4.ip_local_port_range = 10000 65000
net.ipv4.tcp_fin_timeout = 10
net.ipv4.tcp_max_syn_backlog = 30000
net.ipv4.tcp_max_tw_buckets = 2000000
net.ipv4.tcp_rfc1337 = 1
net.ipv4.tcp_rmem = 4096 87380 16777216
net.ipv4.tcp_sack=0
net.ipv4.tcp_slow_start_after_idle = 0
net.ipv4.tcp_timestamps=0
net.ipv4.tcp_tw_reuse = 1
net.ipv4.tcp_wmem = 4096 65536 16777216
net.ipv4.udp_rmem_min = 8192
net.ipv4.udp_wmem_min = 8192
vm.swappiness = 10

A reboot will bring the box up with your new settings, or you can force a reload with sysctl -p (or sudo sysctl -p if you’re not root.) Combined, these two tweaks resulted in the throughout of the system going from about 40MB/s to 120MB/s, so it’s definitely worth doing.

Step 3: Power Tuning
The idle power of the MicroServer wasn’t great when I was finished tuning the network, pulling around 40W from the wall. A little careful tuning of the system, though, and that dropped to 21W – a significant saving.

First, we’ll discuss the fixes that won’t cause you any problems. Open /etc/rc.local again and add the following lines:

echo 'min_power' > '/sys/class/scsi_host/host2/link_power_management_policy'
echo 'min_power' > '/sys/class/scsi_host/host3/link_power_management_policy'
echo 'min_power' > '/sys/class/scsi_host/host4/link_power_management_policy'
echo 'min_power' > '/sys/class/scsi_host/host5/link_power_management_policy'
echo '0' > '/proc/sys/kernel/nmi_watchdog'
echo '1500' > '/proc/sys/vm/dirty_writeback_centisecs'
echo 'auto' > '/sys/bus/pci/devices/0000:00:18.3/power/control'
echo 'auto' > '/sys/bus/pci/devices/0000:00:00.0/power/control'
echo 'auto' > '/sys/bus/pci/devices/0000:00:01.0/power/control'
echo 'auto' > '/sys/bus/pci/devices/0000:00:06.0/power/control'
echo 'auto' > '/sys/bus/pci/devices/0000:01:05.0/power/control'
echo 'auto' > '/sys/bus/pci/devices/0000:00:11.0/power/control'
echo 'auto' > '/sys/bus/pci/devices/0000:00:12.0/power/control'
echo 'auto' > '/sys/bus/pci/devices/0000:00:13.0/power/control'
echo 'auto' > '/sys/bus/pci/devices/0000:00:13.2/power/control'
echo 'auto' > '/sys/bus/pci/devices/0000:00:18.4/power/control'
echo 'auto' > '/sys/bus/pci/devices/0000:00:12.2/power/control'
echo 'auto' > '/sys/bus/pci/devices/0000:00:18.2/power/control'
echo 'auto' > '/sys/bus/pci/devices/0000:00:14.0/power/control'
echo 'auto' > '/sys/bus/pci/devices/0000:00:14.1/power/control'
echo 'auto' > '/sys/bus/pci/devices/0000:00:14.3/power/control'
echo 'auto' > '/sys/bus/pci/devices/0000:00:14.4/power/control'
echo 'auto' > '/sys/bus/pci/devices/0000:00:16.0/power/control'
echo 'auto' > '/sys/bus/pci/devices/0000:00:16.2/power/control'
echo 'auto' > '/sys/bus/pci/devices/0000:00:18.0/power/control'
echo 'auto' > '/sys/bus/pci/devices/0000:00:18.1/power/control'
echo 'auto' > '/sys/bus/pci/devices/0000:02:00.0/power/control'

That’ll have a small but noticeable impact on power draw at idle, enabling a bunch of typically-off power management features. If you’ve got additional USB or PCIe devices in your MicroServer, you may find that this doesn’t catch all of ’em; install PowerTOP and go to the ‘Tunables’ tab to see if there’s anything labelled ‘Bad,’ then toggle it to ‘Good.’

That’s a start, but for real savings we need to spin the drives down. This may or may not be possible in your usage scenario: mechanical drives have a limited number of load/unload cycles before they break, and the last thing you want to be doing is having it constantly spinning down and spinning back up again. Because I’m not always accessing the MicroServer – I back up to it once a day, stream media from it during the evening, and otherwise mostly leave it alone – I can get away with a reasonably aggressive power-saving plan; you may well need to adjust the numbers below to suit your own needs.

If you want to continue, start with adding the following to /etc/rc.local:

hdparm -S 60 /dev/sda /dev/sdb /dev/sdc /dev/sdd
hdparm -B 1 /dev/sdb /dev/sdc /dev/sdd
hdparm -M 128 /dev/sdb /dev/sdc /dev/sdd

That tells the system to spin all four hard drives down after 300 seconds of inactivity. If you ain’t got four hard drives, edit the line accordingly. Some drives may not sleep on their own; if that’s the case, have a look at the Powernap tool and use it in conjunction with ‘hdparm -y’ to force a drive to spin down. I use it on my system because one drive of a mirror sleeps while the other stays awake; Powernap watches for this, and when the first drive sleeps it forces the second into the low-power state.

The second command puts the drives in the most aggressive power management level possible, while the third puts it into the quietest possible acoustic management mode. Note that I haven’t included the boot drive sda there: the drive that came with my MicroServer doesn’t support either of those settings. Try running the command yourself, and if your drives do support it then add them to the above list.

One drive that won’t spin down is your boot drive – in my case, the 250GB drive the MicroServer came with. If that’s a problem, consider switching to a solid-state drive (SSD) instead. If you’re truly desperate to save as much power as possible but have no cash left, however, there are options. First, move /var – the bit of the disk that sees the most activity, in particular due to the log files held in /var/log, to a spare USB flash drive you’ve got lying around. You’ll need at least 1GB, preferably 2GB or more to allow for sudden growth.

The procedure for moving /var isn’t straightforward, and is rife with danger – it’s perfectly possible to end up with a non-booting system. If you’re still reading, here’s how I did it (as root) with the USB stick inserted as /dev/sde. First, edit /etc/fstab and insert a line to mount the USB stick as /var, and while you’re at it edit the root mount point to disable access time writing.

/dev/sde1       /var    ext4    defaults,noatime,nodiratime     0       1
/dev/sda1       /       ext4    noatime,nodiratime,errors=remount-ro 0       1

I’d recommend using the drive’s UUID (visible with the blkid command) instead of the device node, ‘cos you don’t want the system to get confused and mount the wrong drive. Next, populate the drive:

mkfs.ext4 /dev/sde1
mkdir /tempvar
mount -t ext4 /dev/sde1 /tempvar
cp -rfp /var -T /tempvar
umount /tempvar
mount /dev/sde1 /var
reboot

When the server comes up – assuming nothing went wrong – /var is now running from the USB drive, saving writes to the mechanical drive. However, you may find the mechanical drive still doesn’t spin down. In my case, this was ‘cos I was running a journalling file system – ext4 – which was always writing data to the disk. Simple fix: turn journalling off.

Another warning: turning journalling off is a really bad idea. Journalling is there to ensure that the file system doesn’t get corrupted. Turn it off, and there’s a non-zero chance that a sudden reboot – a power-cut, say – will result in a corrupt root file system and a non-booting server. I’ve got a UPS and a backup of the file system, so it’s a chance I’m willing to take – but consider the implications long and hard before continuing.

If you’re still convinced you want to do this, you can turn ext4’s journalling option off by remounting the root filesystem read-only and issuing the following command:

tune2fs -O "^has_journal" /dev/sda1

With that, the root drive is now free to spin down – resulting in the aforementioned 21W idle power draw. But seriously, don’t do this. Just buy a cheap SSD instead.

UPDATE, 20161210

When I originally wrote this post, the only way to download collections of files from the Internet Archive in bulk was to perform a manual search, process the resulting CSV, and feed that into wget in a rather inefficient process. Thankfully, that’s no longer the case: there’s now an official Internet Archive software package which includes a command-line too, ia, for performing a variety of actions – including downloading content in bulk.

So, here’s how you really download bulk content from the Internet Archive. You start by installing the tools:

sudo apt-get install python-pip
pip install internetarchive

You log in to your Internet Archive account via the tool:

ia configure

Then, finally, you trigger the download for your chosen collection name:

ia download --search='collection:personalcomputerworld' --no-directories --glob=\*pdf

Change the file extension at the end if you’d prefer formats other than PDF. If you’re a power-user (oooh) and have GNU Parallel installed, you can even run multiple download streams at once to speed things up:

ia search 'collection:personalcomputerworld' --itemlist | parallel 'ia download {} --no-directories --glob=\*pdf'

The original script and post are included below, for posterity.

Read More →

I had cause to need to mount a hard drive – actually, a Compact Flash card, but that’s beside the point – from an Amiga on my PC the other day. In theory, not a problem: Linux includes in-built support for Amiga FastFileSystem (AFFS) devices, so it should just be a case of identifying which of the three partitions I’m after and giving the mount command.

So, let’s fire up fdisk:

$ sudo fdisk -l
 Disk /dev/sdc: 4009 MB, 4009549824 bytes
 124 heads, 62 sectors/track, 1018 cylinders, total 7831152 sectors
 Units = sectors of 1 * 512 = 512 bytes
 Sector size (logical/physical): 512 bytes / 512 bytes
 I/O size (minimum/optimal): 512 bytes / 512 bytes
 Disk identifier: 0x00000000
Disk /dev/sdc doesn't contain a valid partition table

Huh. That’s odd – it certainly should. Other partitioning tools say the same thing – and the reason becomes clear: apparently, while Linux technically understands AFFS partitions, it doesn’t actually understand Amiga partition tables. At least, most packages don’t: thankfully, one package does. So, to the wonderful parted:

$ parted /dev/sdc
 WARNING: You are not superuser. Watch out for permissions.
 GNU Parted 2.3
 Using /dev/sdc
 Welcome to GNU Parted! Type 'help' to view a list of commands.
 (parted) u
 Unit? [compact]? b
 (parted) p
 Pralloc = 0, Reserved = 2, blocksize = 1, root block at 62832
 Pralloc = 0, Reserved = 2, blocksize = 1, root block at 2112896
 Pralloc = 0, Reserved = 2, blocksize = 1, root block at 5965912
 Model: Generic STORAGE DEVICE (scsi)
 Disk /dev/sdc: 4009549824B
 Sector size (logical/physical): 512B/512B
 Partition Table: amiga
Number Start End Size File system Name Flags
 1 278528B 64061439B 63782912B affs1 DH0 boot
 2 64061440B 2099544063B 2035482624B affs1 DH1
 3 2099544064B 4009549823B 1910005760B affs1 DH2
(parted) quit

You may notice I told parted to switch unit type from the default – Compact – to Bytes. There’s a reason for that: because the kernel can’t see the partition table, it hasn’t created the usual sdc1, sdc2 and sdc3 devices under /dev – meaning I can’t tell mount where to look for the third partition, which is the one I’m after. A problem – but one that can be resolved by giving mount an offset option, taken from the ‘Start’ column of parted’s output:

$ sudo mkdir /media/AmigaMount
$ sudo mount -t affs -o offset=2099544064 /dev/sdc /media/AmigaMount
 mount: wrong fs type, bad option, bad superblock on /dev/sdc,
 missing codepage or helper program, or other error
 In some cases useful info is found in syslog - try
 dmesg | tail or so

Huh? What does dmesg have to say about this?

$ dmesg | tail -1
 [83740.730900] AFFS: No valid root block on device /dev/sdc

Okay, so that didn’t work. Now it’s time for the brute-force option: if mount’s offset command won’t work, let’s try setting up a loop device on the partition’s offset:

$ sudo losetup -o 2099544064 /dev/loop1 /dev/sdc
$ sudo mount -t affs /dev/loop1 /media/AmigaMount
$ ls /media/AmigaMount
 A500_A600_EtoZGames Disk.info Favorite Games.info
 A500_A600_EtoZGames.info Favorite Games

Bingo! At this point, you can read or write any file you like to the partition. To mount a different partition on the disk, simply give losetup the offset of that partition as reported by parted – remembering to tell parted to switch to bytes as its unit.

Having finished sticking my files on the drive, it’s time to tidy up and unmount:

$ sync
$ sudo umount /media/AmigaMount

Eject the drive, stick it back in the Amiga and lo: my files are there.

An alternative method to the above is to use an Amiga emulator on your PC: UAE, for example, can mount a real Amiga drive. This way’s easier, though – at least, if you don’t have to go through the troubleshooting steps that brought me to my understanding of the flaw.

To recap: insert Amiga drive, use parted in bytes mode to get partition offset, setup loop device at that offset, mount loop device. Not as simple as it should be, but hey: it works. This also works, interestingly enough, on disk images: create a backup of your Amiga drive with dd and you can then mount partitions directly from the backup rather than the real drive.

ExifTools

I upgraded my Galaxy SII to a custom version of Android 4.0.4 Ice Cream Sandwich the other night, and it’s been brilliant – except for one little bug. If I go into the Gallery app, images on my microSD are in a semi-random order. If I tell Android to group by time, the problem becomes apparent: large numbers of images, always in contiguous blocks, are thought to have been taken between 1992 and 2018. I didn’t have an Android phone in 1992, and 2018 hasn’t happened yet – clearly, it’s a bug.

A quick search turned up this Google Code issue, which matches what I’m seeing exactly: GPS data is sometimes corrupted as it writes to the image. Worryingly, the bug dates back to at least Android 2.3 Gingerbread – which I can confirm, as the images in question were taken while the Galaxy SII was still running 2.3.4 – but Google promises a fix is incoming.

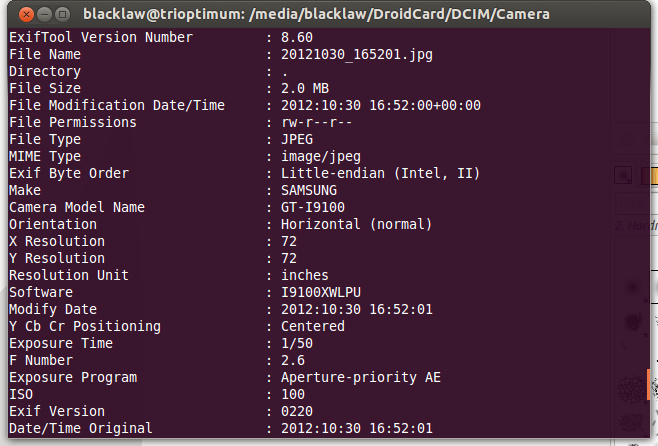
Here’s an example of the problem. The GPS Date tag from a non-corrupt image reads 2012:10:30 – year, month, day with a colon delimiter. The GPS Date tag from a corrupt image reads 0112:09:26 – a clearly invalid date which is confusing the heck out of the Gallery app. (You can check this out yourself with the command exiftool -gps:GPSDateStamp filename.jpg)

But why have I only just spotted the problem? Simple: the ICS – and Jelly Bean – Gallery app has changed its behaviour from previous versions. Where the old Gingerbread Gallery used to use the file modified date to sort the images, the ICS and newer Gallery uses the GPS Date Stamp tag from the EXIF data – the very tag that is being corrupted by the bug. Why it does that, I have no idea: there are numerous other EXIF tags which have the right date stamp and would be more appropriate for sorting, such as the Date Time (Original) tag. Perhaps that’s Google’s fix: modify the Gallery to sort on a different tag.

A pending fix doesn’t solve the fact that I’ve got a few hundred images with corrupt EXIF information, though. Switching to a third-party image viewer, like QuickPic, orders the images correctly, but that’s a workaround at best. So, I’ve written a quick tool to correct the invalid EXIF data on all my images.

It’s a bash shell script, and simple enough: it calls the ExifTool Perl package to copy the date from the Date Time (Original) tag over the top of the GPS Date Stamp tag. The result: the invalid tag goes away, Android knows what year the image was taken, and it orders the gallery correctly. It’s a hack: it overwrites the GPS Date Stamp of all JPG images in the current directory, regardless of whether the year makes sense or not, but it fixes the problem – albeit slowly.

You can find the script on GitHub. Hope it helps!

When you’ve corrected your images, you’ll need to go into Settings and Applications on your Android phone. Choose ‘All,’ find the Gallery app and tap it to get into the menu. Hit ‘Force Stop’ and then ‘Clear Data’ – don’t worry, you won’t lose any images, this just deletes the file database and thumbnail cache. If you don’t, the Gallery will still use the old ordering data and you’ll still have a problem. When that’s done, load the Gallery, let it find your files, and enjoy having all your images in the right order.

Oh, and one other thing: take a backup of your images before running the script. Although it worked fine for me, I can’t guarantee it won’t corrupt images further – and I don’t want to be responsible for you losing your precious photos.

Android Terminal Emulator running on a Milestone

Android Terminal Emulator running on a MilestoneRooting your Android smartphone can offer some pretty amazing benefits, from simple things like the ability to take screenshots to the option to use your handset as a Wi-Fi hotspot.  Perhaps the most impressive, however, is the option to change the apps that are pre-installed on your ‘phone, and replace them with your own.

In the case of my handset, a Motorola Milestone, app memory is at a premium: with just 196MiB of user-accessible storage on-board, larger apps can often mean having to remove something that’s already installed.  Thankfully, there’s a cheater’s way of freeing up some much-needed space: turn your optional apps into pre-installed versions.

First things first: you’re going to need a rooted handset.  If it’s not rooted, this tutorial will get you nowhere.  If you’re new to rooting, try the Easy Root Compatibility Test which offers certain ‘phones a one-stop solution.  If your handset isn’t supported, try one of the many guides on-line.

Once you’re rooted, you’re going to need a terminal emulator.  Install that, and you can get access to a shell – which is where the fun begins.

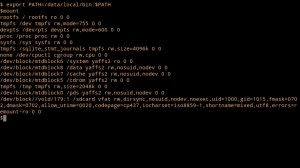
Step one – find out what’s mounted where with the command

 mount

You’ll see that we have a bunch of devices mounted in a bunch of locations, but the one we care about is /dev/mtdblock6, mounted as /system.  It’s in this special directory that Android stores all its internal gubbins – and to stop you from fiddling around with it, Google has very sensibly made it read-only.

Sadly, that also stops us from moving apps from the very limited user memory into the otherwise wasted system memory – and from deleting unwanted pre-installed apps, such as the Motorola-branded sat nav package that comes with the Milestone or the Facebook app that arrived unexpectedly as part of Android 2.1.

So, what can we do?  Easy: we re-mount the device as read-write.  You’ll need to become root using su, after which you can remount the block device.  Just type the following commands in to the terminal:

su -
mount -o remount,rw /dev/mdtblock6 /system

Now we have full read-write access to the /system file system. Bring up a directory listing of /system/app/ with:

ls -l /system/app/

You’ll notice that all the .apk files for the pre-installed apps are here.  Delete any .apk with rm and it’s gone for good – so for goodness’ sake be careful.

We can use the same command to take  a look at the .apk files for the apps we’ve got installed in user memory, too:

ls -l /data/app/

To move a package from user memory to system memory, making it ‘pre-installed’ and freeing up useful user memory, just do the following:

cp -f /data/app/com.publisher.packagename.apk

The file will be automatically removed from user memory and appear to vanish – but when you restart your ‘phone, it will re-appear as a pre-installed ‘system’ application.  Do this with a larger app, and you can free up a lot of valuable space.

A note about updating: because /system is mounted as read-only, the Android Market can’t write to it in order to update packages.  Instead, if an update for a pre-installed package is available, it will write the data back into user memory.  So, if you’ve saved 4MiB by moving Google Maps into /system, you’ll lose it all again the next time Google releases an update.

While it’s possible to get the space back – simply repeat the method of moving the file to /system again – it’s probably better to move applications that don’t get updated all that often.

That’s it: you can now enjoy significantly more space for apps!

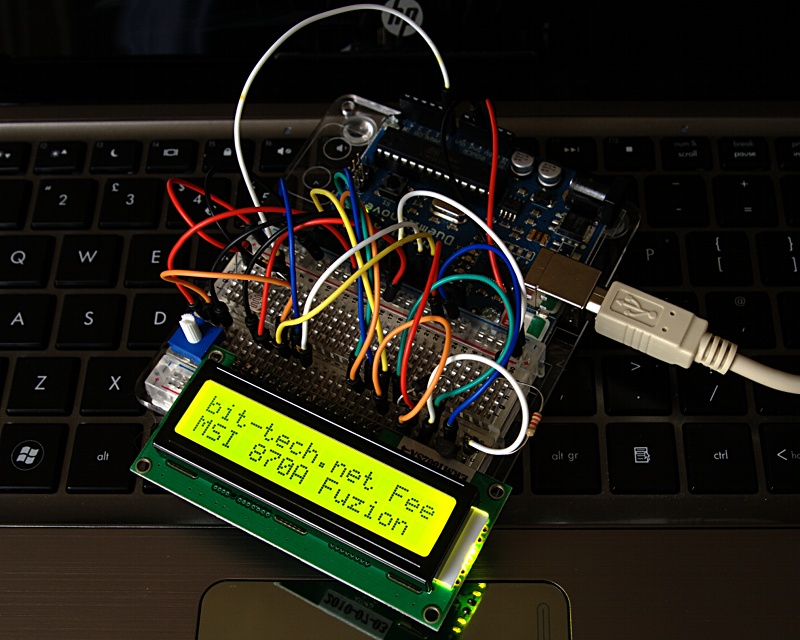
The aRSSduino in action

The aRSSduino in actionThe aRSSduino is a simple project for the Arduino microcontroller, designed to display RSS feed entries on a 16×2 LCD.  It’s still in the early stages, with the following outstanding:

  • To Do: Support for larger LCDs
  • To Improve: Better UTF-8 character handling
  • To Do: Multiple RSS feed support

For now, however, it’s a pretty neat hack – and an alternative back-end allows it to display Twitter @ replies instead, with the person’s username on the top line of the display and the message below.

The aRSSduino relies on a USB connection between the Arduino and the host PC – it’s not a stand-alone project.  Currently, the Python back-end is written to run on a Linux-based host – although it should be relatively simple to port to Windows, I have no plans to do so at present.

You can download the project source code – both for the Arduino sketch and for the Python-based back-end here.  If you improve upon it, let me know!

Having finished my articles this morning, I figured it was time for an apt-get dist-upgrade on the laptop to ensure I was running the latest versions of everything.  A quick download and install later, and it was time to reboot.

At which point Firefox broke completely. No starty, no error – even when launched from the shell.

It’s taken me a little while, but I’ve tracked down the culprit: the Prism plugin.  If you’ve got Prism – a stand-alone Mozilla-based browser for creating desktop-style access to web apps – then the chances are you’ll be bitten by this bug, as installing Prism automatically installs the plugin into Firefox.

Thankfully, the fix is simple: go to Tools -> Add-Ons and disable Prism.

What’s that?  You can’t load Firefox in order to disable the Prism plugin?  There’s a fix for that, too.  Load a shell (Applications -> Accessories -> Terminal) and type:

cd ~/.mozilla/firefox
ls

That’ll give you a listing of the directory – with a single entry, which is your profile folder.  Use cd to change to this directory, then type:

rm compatibility.ini

Once you’ve done that, Firefox should start fine and you’ll be able to disable the add-on.

If you’re curious, there’s a bug filed on Launchpad over here.

miniDNLA configSince my PC blew up – and took Windows with it – I’ve been gradually making the switch to using Linux as my everyday desktop operating system.  Although I’ve been using it on my laptops and netbooks for years, I’ve usually kept Windows on the desktop for one simple reason: TVersity.

TVersity is an excellent UPnP media server which works perfectly with my media playback devices – the PS3, the Xbox 360, and the Roku SoundBridge in the bedroom.  Sadly, it’s Windows only – and most of the Linux equivalents have left me cold.

I stumbled across a small daemon called miniDLNA, written by a Netgear engineer for the company’s ReadyNAS range of network attached storage devices, which works like a charm as a TVersity replacement, with one exception – the damn thing refuses to be seen by the Xbox 360.  Thankfully, I’ve figured out why.

In the configuration file – /etc/minidlna.conf – the software makes reference to a “presentation URL,” which by default is commented out.  This results in an invalid default of http://192.168.0.1:80/, which everything except the Xbox 360 happily ignores.  The 360, however, decides to go visit this URL – and falls over.

To fix the issue, simply change the line to the IP address of your server and the port you’ve got miniDLNA working on – 8200 by default.  The entire line should end up reading:

# default presentation url is http address on port 80
presentation_url=http://192.168.0.20:8200/

Once that’s done, restart miniDLNA and everything should spring into life.

Powered by Ubuntu stickerMy laptop is now officially Powered by Ubuntu, thanks to System 76 and the Linux Emporium.

To snag yourself some free Ubuntu stickers, simply pop a self addressed envelope across to:

The Linux Emporium
Bridge House
17a Maybrook Road
Sutton Coldfield
Birmingham
B76 1AL UK

They’ll drop a pack of four by return of post.  I think you’ll agree that it looks much nicer than the old “Designed for Windows Vista” sticker it replaces.